Appetizer

Butternut Squash Mini-Pizzas

Paleo Butternut Squash Mini-Pizzas

I made these Butternut Squash Mini-Pizzas for a post-Valentine day potluck that we hosted at our house last night. It was a way to celebrate Valentine’s for those of us who have small children and no baby-sitters. We just wanted to say that we did something special for Valentines, even though we had a dozen loud kids hijacking our not-so-romantic party.  I can’t complain about it, I know that they are little for such a short period of time and someday I am really going to miss this beautiful chaos.

These were enjoyed by both adults and kids and they were the first dish to disappear, followed by my dairy-free, refined sugar-free fudge. The toppings can be varied to your likings. I like the pesto/butternut squash combination and it makes it so that you don’t really need to add cheese to it, but it can be made with more traditional ingredients as well: tomato sauce, mozzarella, pepperoni, etc. If you are using meats, onions, or other veggies, cook them before adding them to the pizza because they will take longer to cook than the squash crust.

For other grain-free pizza ideas try my Portobello mini-pizzas, meatza or cauliflower pizza crust.

Ingredients:

1 medium butternut squash, choose one with a wide and long neck, as the round and bulging side is hollow and cannot be sliced into rounds

6-8 ounces of dairy-free pesto ( See recipe below)

2 sliced Roma tomatoes

4-6 ounces of cooked nitrate free sausage or grilled veggies


Preparation:

  • Preheat oven to 425 degrees Fahrenheit.
  • Peel the squash ( I use a potato peeler) and slice the top part into ¼ inch thick rounds.
  • Arrange rounds on a greased or parchment paper-lined cookie sheet.
  • Bake for 15 minutes.
  • Spread the pesto sauce over each round.
  • Add toppings and bake until squash is soft.


To make the pesto blend 1/2 cup of basil leaves,  1/3 cup of pine nuts
1/4, 1-2 garlic cloves
,1/4 cup of olive oil, and salt to taste until creamy.

 Primal Butternut Squash Mini-Pizza

Butternut Squash Mini-Pizzas
Recipe Type: Appetizer
Cuisine: Paleo
Author: Edible Harmony
Prep time:
Cook time:
Total time:
Serves: 4-8
Ingredients
  • 1 medium butternut squash, choose one with a wide and long neck, as the round and bulging side is hollow and cannot be sliced into rounds
  • 6-8 ounces of dairy-free pesto ( See recipe below)
  • 2 sliced Roma tomatoes
  • 4-6 ounces of cooked nitrate free sausage or grilled veggies
Instructions
  1. Preheat oven to 425 degrees Fahrenheit.
  2. Peel the squash ( I use a potato peeler) and slice the top part into ¼ inch thick rounds.
  3. Arrange rounds on a greased or parchment paper-lined cookie sheet.
  4. Bake for 15 minutes.
  5. Spread the pesto sauce over each round.
  6. Add toppings and bake until squash is soft.


Appetizer

Paleo Chicken Salad Cucumber Cups

Paleo Chicken Salad Cucumber Cups

Paleo Chicken Salad Cucumber Cups are a very simple, light and refreshing appetizer. I have made them with leftover Thanksgiving turkey, rotisserie chicken, or I simply grilled, baked or simmered a few pieces of boneless chicken. You can also stuff tomatoes, baked zucchini, or use the chicken salad to make lettuce wraps.

I have made these several times, and have used different herbs and seasonings each time. So far my favorite is dill. When working with fresh herbs it is sometimes hard to give you an accurate measurement, because it all depends on how much you pack the herbs in the spoon, how fine you chop them or how fresh they are. So add fresh herbs to taste.

Valentines is right around the corner and I was saving one of my best chocolate creations for this week. A few months back I made the most delicious and dense chocolate cake, a fusion of a Bundt cake with a dense and creamy fudge feel to it. I have been trying to figure out where I wrote down the recipe and apparently I didn’t, or I lost it along with the many other post-its or credit card statements where I write my recipes as I cook. I definitely need to come up with a better system. I will try to make something sweet and “chocolaty” in the next few days

For other appetizer ideas, check my paleo empanadas, roast beef cucumber sandwiches or sesame chicken wings

Ingredients:

1 1/2 cups of cooked boneless chicken or turkey
1/4 cup of mayo
2-3 tbsp of chipped chives or fresh dill
2 tbsp of lemon juice
1 tablespoon of Dijon mustard
Salt and pepper to taste
5 or 6 cucumbers (peeled or unpeeled)
Paprika to sprinkle on top (optional)

Preparation:

  • Using a food processor pulse in the chicken, mayo, mustard, lemon juice, herbs, and spices, until the chicken is chopped in small pieces. If you don’t have a food processor you can chop it all by hand and combine in a large bowl.
  • Cut the ends of the cucumbers.
  • Slice the cucumbers into 1 to 1 1/2 inch-thick slices.
  • Using a spoon or melon baller scoop out some of the seeds of the cucumber, but leave a layer at the bottom to hold the filling. 
  • Stuff the cucumbers with the chicken salad.
  • Sprinkle with some paprika or chopped chives.
Paleo Chicken Salad Cucumber Cups
Author: Edible Harmony
Prep time:
Total time:
Serves: 10
Ingredients
  • 1 1/2 cups of cooked boneless chicken or turkey
  • 1/4 cup of mayo
  • 2-3 tbsp of chipped chives or fresh dill
  • 2 tbsp of lemon juice
  • 1 tablespoon of Dijon mustard
  • Salt and pepper to taste
  • 5 or 6 cucumbers (peeled or unpeeled)
  • Paprika to sprinkle on top (optional)
Instructions
  1. Using a food processor pulse in the chicken, mayo, mustard, lemon juice, herbs, and spices, until the chicken is chopped in small pieces. If you don’t have a food processor you can chop it all by hand and combine in a large bowl.
  2. Cut the ends of the cucumbers.
  3. Slice the cucumbers into 1 to 1 1/2 inch-thick slices.
  4. Using a spoon or melon baller scoop out some of the seeds of the cucumber, but leave a layer at the bottom to hold the filling.
  5. Stuff the cucumbers with the chicken salad.
  6. Sprinkle with some paprika or chopped chives


Appetizer · Chicken · Entree · Side Dish

Paleo Chicken Tacos

Primal Tacos

It is possible to make Paleo Chicken Tacos without wrapping them in plain boring lettuce; these ones are wrapped in a jicama shell. The trick is to slice the jicama very thinly and soak it in warm water until flexible. I recommend using a mandolin slicer or an electric food slicer, but a large very sharp knife will work too

A few months ago, I wanted to have a small and casual gathering to celebrate my husband’s birthday. We had just returned from a vacation less than a week before, we were all jetlagged and adjusting back to our routine so I wanted to keep things simple. Before I knew it, the list of confirmed guests had tripled my estimated head count; my girls were cranky and clingy and with a schedule still 9 hours ahead. I wasn’t even going to attempt cooking for the event; instead I hired a taco stand. Easy enough! …The only problem was that a large number of my friends have now gone grain free as well. This jicama shells saved the quasi-paleo party, everyone loved them. Except the “taco guy”, I wish I knew what he was really thinking when I handed him 2 large bowl of swimming jicama slices and told him that a lot of people don’t eat corn and were going to use those instead. The puzzled look on his face was priceless so I kept my Mexican cauliflower “rice” a secret.

Besides making taco shells with them I use jicama to substitute croutons in my salads, cut them into sticks for dipping or just chop them and eat them with salt and lemon, they are a low in calories and a great source of vitamin C and fiber.

Ingredients:

1 jicama
1 lb. of diced boneless chicken
1 medium onion, sliced
1 red bell pepper
3 garlic cloves, minced
1-2 tbsp of lard, butter or coconut oil
1 tsp of cumin
1 tsp of chili powder
1 tsp of dry oregano
½ tsp of smoked paprika
Salt and pepper to taste
2 avocados
Cilantro to garnish

Preparation:

  • Slice the jicama into very thin rounds, about the thickness of tortillas.
  • Soak the jicama slices in warm/hot water for 30 minutes, or until flexible. Do not cook them.
  • In a large skillet over medium/high heat, sauté the onions in the oil for 3-4 minutes.
  • Add the chicken, garlic, bell pepper and spices and continue to cook until the chicken is well done.
  • Dry the jicama rounds and top with the chicken, avocado slices and cilantro.

For similar recipes, try my lettuce chicken wraps or my grain-free wraps.

Paleo Chicken Tacos

Recipe Type: Appetizer
Cuisine: Mexican-Paleo
Author: Edible Harmony
Prep time:
Cook time:
Total time:
Serves: 4
Ingredients
  • 1 jicama
  • 1 lb. of diced boneless chicken
  • 1 medium onion, sliced
  • 1 red bell pepper
  • 3 garlic cloves, minced
  • 1-2 tbsp of lard, butter or coconut oil
  • 1 tsp of cumin
  • 1 tsp of chili powder
  • 1 tsp of dry oregano
  • ½ tsp of smoked paprika
  • Salt and pepper to taste
  • 2 avocados
  • Cilantro to garnish
Instructions
  1. Slice the jicama into very thin rounds, about the thickness of tortillas.
  2. Soak the jicama slices in warm/hot water for 30 minutes, or until flexible. Do not cook them.
  3. In a large skillet over medium/high heat, sauté the onions in the oil for 3-4 minutes.
  4. Add the chicken, garlic, bell pepper and spices and continue to cook until the chicken is well done.
  5. Dry the jicama rounds and top with the chicken, avocado slices and cilantro.
Appetizer · Side Dish

Paleo Chili Cups

Paleo Chili Cups

With the Super Bowl around the corner these Paleo Chili Cup recipe come at a great time, a hearty hors-d’oeuvre without the mess of a bowl of chili, and with a far better presentation.

There are so many misconceptions about the Paleo or Primal lifestyle, one of them being that we eat primarily meat. I have to say that since going primal, my intake of meat has not increased, but my vegetable consumption more than doubled. A couple of years ago, I would have made this with a can of gas-inducing, tummy-bloating beans and wheat flour, which I have now replaced with fresh  vegetables and a much more nutritious plantain cup.

When choosing the plantains make sure their peel is green, as when they start to get yellow they become sweet and soft. You can also serve the chili in raw bell pepper “cups” instead.

Ingredients for the chili:

2 tbsp of lard, coconut oil, or tallow
2 medium onions, chopped
3 slices of bacon, chopped (optional)
4 garlic cloves, minced
1 pound of ground meat, I used organic ground chicken
1 teaspoon ground coriander
2-3 teaspoons ground cumin
1 tsp of smoked paprika
3 cups of crushed tomatoes or plain roasted tomatoes, if using my homemade recipe, avoid the spices
3 cups of chopped vegetables. (I used carrots and celery)
1 tbsp of lime juice
2-3 tsp of chili powder
1 large jalapeño pepper, seeded, finely chopped (optional)
Salt and freshly ground pepper to taste

Cilantro and green onions to garnish

Ingredients for the Cups:

6 green plantains
4-5 eggs
6-8 tbsp of lard, coconut oil of preferred cooking fat
1 tsp of cumin
1 tsp of garlic powder
Salt to taste 

Preparation:

  •  In a medium saucepan sauté the onions, bacon and garlic in the cooking fat, until the onions become transparent. (If using bacon you may need less oil).
  • Add the meat and cook until it is medium-well done, breaking up the big chunks of meat.
  • Add the tomato, vegetables, lemon, jalapeño, and spices and continue to cook over medium/low heat until the vegetables are tender.

For the cups:

  • Preheat the oven to 400 degrees Fahrenheit.
  •  Peel and slice the plantains, the easiest way to peel a plantain is to cut off the ends off, cut the plantain in half, cut a slit lengthwise on the peel and separate the peel from the plantain.
  • Place the plantain slices in a cookie sheet and bake for 20 minutes or until the plantains are soft.
  • Allow the plantains to cool.
  • Place all ingredients in a food processor and run until a dough is formed.
  • Line the inside of a greased muffin tin with a 1/3-inch layer of this dough.Grain-Free Chili Cups
  • Bake for an additional 15-20 minutes or until the plantain cup is set and crispy.
  •   Fill the cups with chili and garnish with green onions and cilantro.
  • Serve immediately.


For other Super Bowl recipe ideas try my bacon wrapped dates or my

Appetizer · Entree

Meatza

Paleo Pizza

A meatza is the ultimate meat lover’s pizza, minus the bread. Instead I made the crust with a thin, round, oversized turkey patty, but you can also use any other type of ground meat: pork, lamb, beef, chicken, etc. I prefer to make it with ground chicken or turkey because it has a more neutral flavor and it’s easier to hide behind the Italian Spices.

You can change the toppings with unlimited combinations, according to your likes. This meatza is a lot faster to make than my cauliflower pizza dough, it only bakes for 10 to 15 minutes.

For other pizza ideas, check my Portobello mini pizza recipe.

Ingredients for the crust:

1 lb of ground turkey (chicken, beef or pork would work)
2 tsp of garlic powder
2 tsp of dry oregano
Salt and Pepper to taste

Toppings:

3 strips of nitrate-free bacon cut in 4-6 pieces
Half medium onion sliced
½ cup or marinara sauce
1 cup of shredded mozzarella cheese or cashew cheese spread
2 garlic cloves sliced
Half red bell pepper cut into strips
Black olives and fresh parsley

Preparation:

  • Preheat oven to 400 degrees Fahrenheit.
  • In a large bowl combine the ground meat with the garlic powder, oregano salt and pepper and combine until the spices are evenly distributed.
  • Place the meat over a greased or parchment paper-lined cookie sheet or pizza mold and using your hand or a rolling-pin flatten the meat out to form the pizza crust into desired size and thickness.
  • Bake for 10 minutes or until the meat is fully cooked and remove from heat.
  • Meanwhile, in a medium pan sauté the bacon, onions, garlic and bell pepper, until the onions are tender.
  • Spread the marinara sauce over the meatza crust and top it with the shredded cheese.
  • Add the rest of the toppings and bake until the cheese is melted.
Appetizer · Breakfast · Entree · Side Dish

Grain-Free Wrap

Paleo Wrap

//
//

Going grain-free has become a lot easier than one might think…after a while you completely stop feeling deprived. You stop craving “bad” food and realize that you do not need to make the grain-free version of all the commercially-made food. I have gotten all of that down, but once in a while I just want more than just a few lettuce leaves to hold my sandwich meat, taco meat or hamburger patty, so I have been making these grain-free wraps quite a bit lately.

These are surprisingly fast and easy to make and they require minimal kitchen utensils; just a bowl, a fork, and a pan. They are very versatile and can be seasoned in many different ways in accordance to their filling. If you are having a mexican theme you can add cumin, garlic powder, lard and chilli; add rosemary for a lamb wrap, curry for an indian style dish, garlic powder and oregano for a meat ball wrap, etc.

The secret to these grain-free wrap is to cook them in low/medium heat and not to overcook them into a stiff or brittle tortilla.

You may also want to try my Thai lettuce wraps or paleo tortilla chips

Ingredients:

1 tbsp of ground flax seeds
1 tbsp of chia seeds (ground or whole)
1 tbsp of almond flour
1 large egg
salt to taste
desired spices
butter, coconut oil, lard, tallow or desired cooking fat

Preparation:

  • In a small bowl combine the egg, flax, almond flour, chia, salt and spices and whisk until well combined.
  • Let sit for 3-5 minutes to allow the seeds to absorb the moisture.
  • Lightly grease a pan with oil of preference and heat over medium low heat.
  • Pour the mixture into the pan, using a spatula or the back of a spoon, spread and flatten the dough
  • Once the wrap is set, turn and cook the other side. Do not over cook or it won’t be flexible.
  • If you are making several wraps you can pour the batter into a very well greased cookie sheets and bake at 350 until the wrap is set.
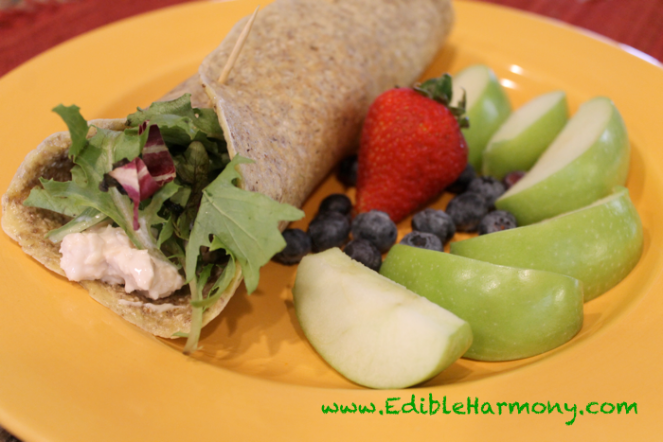
  • Fill with desired ingredients: the wrap picture has chicken salad with homemade mayo, mixed greens, julienned cucumbers, and carrots and mustard.

Grain-Free Wrap

Recipe Type: Paleo Snack
Cuisine: Paleo
Author: Edible Harmony
Prep time:
Cook time:
Total time:
Serves: 1
Ingredients
  • 1 tbsp of ground flax seeds
  • 1 tbsp of chia seeds (ground or whole)
  • 1 tbsp of almond flour
  • 1 large egg
  • salt to taste
  • desired spices
  • butter, coconut oil, lard, tallow or desired cooking fat
Instructions
  1. In a small bowl combine the egg, flax, almond flour, chia, salt and spices and whisk until well combined.
  2. Let sit for 3-5 minutes to allow the seeds to absorb the moisture.
  3. Lightly grease a pan with oil of preference and heat over medium low heat.
  4. Pour the mixture into the pan, using a spatula or the back of a spoon spread and flatten the dough.
  5. Once the wrap is set, turn and cook the other side. Do not over cook or it won’t be flexible.
  6. If you are making several wraps you can pour the batter into a very well greased cookie sheets and bake at 350 until the wrap is set.
  7. Fill with desired ingredients: the wrap picture has chicken salad with homemade mayo, mixed greens, julienned cucumbers, and carrots and mustard.

 A gift for you!

a Rafflecopter giveaway

Appetizer · Side Dish

Popcorn Cauliflower

Paleo Popcorn Cauliflower

This popcorn cauliflower recipe will change the way you see cauliflower. It is simple, fast, and basic and it only calls for four ingredients, yet it is incredibly flavorful. This one will surprise you for sure!

I discovered this dish by accident in one of our almost routinely family weekend late lunches, it was supposed to be just a baked cauliflower side dish, but I got distracted with other dishes and I forgot about all about it. One hour later I opened my oven with disappointment, they looked shrunken, wrinkled and charred, but since it was a just an informal family lunch and I can never throw food away, I served them any way.

Only about half of my relatives got to try them, because they vanished in seconds. Since then, per my cousins request this dish is served at almost all of my family gatherings, I have to make more and more every time, and what started as a one head of cauliflower mishap is now a five cauliflower “event”.

Tips: I usually let the cauliflower charr a bit more than the cauliflower pictured, the cauliflower does shrink a lot so I recommend you to start with a double batch of this.

For other cauliflower recipe ideas try my cauliflower pizza, no-potato salad, or Thai fried “rice”.

Ingredients:

1 Cauliflower head
2-3 tbsp of paleo-approved cooking oil (high smoke point). I’ve used melted coconut oil, tallow and lard
Salt to taste

Preparation:


  • Preheat oven to 400 degrees Fahrenheit.
  • Cut the cauliflower head into small florets, about 1”x 1”.
  • Place cauliflower in a large bowl and coat all sides of the florets the florets with the oil.
  • Sprinkle some salt over and combine.
  • Arrange cauliflower on a single layer over a cookie sheet.
  • Bake for about an hour or until all sides are well brown, turning at least once half way through it.
  • Serve and watch them disappear
Popcorn Cauliflower

Recipe Type: Side Dish
Cuisine: Paleo
Author: Edible Harmony
Prep time:
Cook time:
Total time:
Serves: 1-4
Ingredients
  • 1 Cauliflower head
  • 2-3 tbsp of paleo-approved cooking oil (high smoke point). I’ve used melted coconut oil, tallow and lard
  • Salt to taste
Instructions
  1. Preheat oven to 400 degrees Fahrenheit.
  2. Cut the cauliflower head into small florets, about 1”x 1”.
  3. Place cauliflower in a large bowl and coat all sides of the florets the florets with the oil.
  4. Sprinkle some salt over and combine.
  5. Arrange cauliflower on a single layer over a cookie sheet.
  6. Bake for about 45 minutes to an hour or until all sides are well brown, turning at least once half way through it.
  7. Serve and watch them disappear.


Appetizer · Beef · Chicken · Entree · Pork · Side Dish · Vegetarian

Cauliflower Pizza Crust

Dairy-Free Cauliflower Pizza Crust

http://pagead2.googlesyndication.com/pagead/show_ads.js

This grain-free cauliflower pizza crust is impressively delicious and a much healthier and lighter alternative to regular pizza crust. I am going to give you a “cheesy” version and a dairy-free version.

Since going grain-free, cauliflower has been on my grocery shopping list every single time. I use it to make paleo versions of rice, potato salad, mash potatoes, shepherd’s pie, and I am about to adventure to make savory muffins with it.

I first heard about this recipe over a year ago and I have made it several times, changing ingredients, ratios, and cooking methods and I feel I finally got it to be the way I wanted it. The secret is to remove as much water as possible from the cauliflower.

Ingredients:

1 medium head of cauliflower
1-2 eggs, beaten
1 cup of shredded mozzarella cheese *
1-2 tsp of garlic powder
1 tsp of dry oregano
Salt to taste

Preparation:

  • Preheat oven to 400 degrees F
  • Using a food processor or grater, cut the cauliflower into rice sized pieces. If using a food processor, work in small batches at the time.
  • Put the cauliflower in a medium saucepan or Dutch oven, add ¼ cup of water and cook covered, over medium heat for about 5 minutes or until tender. Add more water if necessary.
  • Drain and strain.
  • Transfer the cauliflower to a nut milk bag, a kitchen towel or several layers of cheese cloth and squeeze as much water out as possible.
  • Let cool off for 10 minutes and add the rest of the ingredient. Add one egg first and add the second egg only if the dough is too dry and not sticking together (Do not add the eggs while the cauliflower is still hot or it will cook them).
  • Spread the dough over a greased cookie sheet or parchment paper into desired shape.
  • Bake for 35-40 minutes.
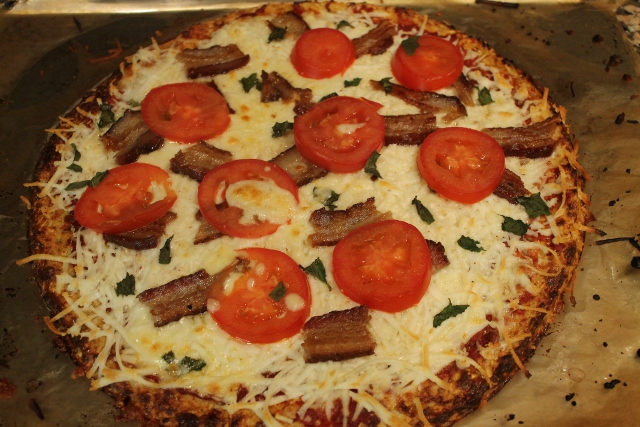
  • Remove from oven and add marinara sauce, cheese and your favorite pizza toppings. If you are using meats they need to be cooked beforehand.
  • Return back to the oven for an additional 10 minutes or until the cheese is melted.


*For the dairy-free variation use one cup of almond flour and 1 tbsp of coconut oil or lard instead of the cheese and one extra egg, if the dough seems too runny add a little bit more almond flour. Bake for an additional 5 minutes before adding the toppings. For a dairy-free cheese spread you can use the one from the sweet plantain empanadas recipe.

Cauliflower Pizza Crust, No-Microwave

Cauliflower Pizza Crust

Recipe Type: Paleo Appetizer
Author: Edible Harmony
Prep time:
Cook time:
Total time:
Serves: 4
Ingredients
  • 1 medium head of cauliflower
  • 1-2 eggs, beaten
  • 1 cup of shredded mozzarella cheese
  • 1-2 tsp of garlic powder
  • 1 tsp of oregano
  • Salt to taste
Instructions
  1. Preheat oven to 400 degrees F
  2. Using a food processor or grater, cut the cauliflower into rice sized pieces. If using a food processor, work in small batches at the time.
  3. Put the cauliflower in a medium saucepan or Dutch oven, add ¼ cup of water and cook covered, over medium heat for about 5 minutes or until tender. Add more water if necessary.
  4. Drain and strain.
  5. Transfer the cauliflower to a nut milk bag, a kitchen towel or several layers of cheese cloth and squeeze as much water out as possible.
  6. Let cool off for 10 minutes and add the rest of the ingredient. Add one egg first and add the second egg only if the dough is too dry and not sticking together (Do not add the eggs while the cauliflower is still hot or it will cook them).
  7. Spread the dough over a greased cookie sheet or parchment paper into desired shape.
  8. Bake for 35-40 minutes.
  9. Remove from oven and add marinara sauce, cheese and your favorite pizza toppings. If you are using meats they need to be cooked beforehand.
  10. Return back to the oven for an additional 10 minutes or until the cheese is melted.
Notes

*For the dairy-free variation use one cup of almond flour and 1 tbsp of coconut oil or lard instead of the cheese and one extra egg, if the dough seems too runny add a little bit more almond flour. Bake for an additional 5 minutes before adding the toppings. For a dairy-free cheese spread you can use the one from the sweet plantain empanadas recipe


Appetizer · Beef · Entree · Side Dish · Vegetarian

Paleo Empanadas

Gluten-Free empanadas

http://pagead2.googlesyndication.com/pagead/show_ads.js

Since going Paleo/Primal there have been only three grain foods that I miss: empanadas, soft pretzels, and churros. These Paleo empanadas crossed one out of my list, now I have to work on the other two.

Made with  green plantains, lard, cumin and other spices, these Paleo empanadas taste very similar to the corn flour ones I grew up with. You can fill them with cheese, vegetables or any kind of meat you want. I used the Cuban Picadillo recipe I posted yesterday

Ingredients:

4 green plantains
5 eggs
5 tbsp of lard, coconut oil of preferred cooking fat, plus more for coating the plantains
1 tsp of cumin
1 tsp of garlic powder
Salt to taste

Preparation:

  • Preheat oven to 425 degrees Fahrenheit
  • Peel the plantains, the easiest way to this is to cut the ends, cut the plantain in half, cut a slit lengthwise and remove the peel.
  • Cut the plantains into 1 inch rounds.
  • Bake for about 15 minutes or until tender.
  • Wait for the plantains to cool down, transfer to a food processor and grind the plantains until they become fine crumbs.
  • Add the rest of the ingredients and blend until a dough is formed. Make sure the plantains aren’t too hot or the egg will cook.
  • Roll the though into 1 ½ to 2 inch balls
  • Place over a piece of parchment paper, cover with another piece of parchment paper and using your hands or a rolling-pin flatten them into a 1/8 inch thick tortillas.
  • Place a small amount of filling in the middle of the tortilla.Green Plantain Empanadas
  • Using the parchment paper, fold the tortilla in half.Gluten Free Empanadas
  • Press the sides of the empanadas with your fingers to secure the filling insideGrain-free empanadas
  • Place empanadas in a cookie sheet and bake at 425 F for about 20 minutes on each side or until golden brown
  • Serve as is or with fresh salsa, guacamole or chimichurri
Paleo Empanadas
Recipe Type: Paleo Appetizer
Author: Edible Harmony
Prep time:
Cook time:
Total time:
Serves: 8
Ingredients
  • 4 plantains
  • 5 eggs
  • 5 tbsp of lard, coconut oil of preferred cooking fat, plus more for coating the plantains
  • 1 tsp of cumin
  • 1 tsp of garlic powder
  • Salt to taste
Instructions
  1. Preheat oven to 425 degrees Fahrenheit
  2. Peel the plantains, the easiest way to this is to cut the ends, cut the plantain in half, cut a slit lengthwise and remove the peel.
  3. Cut the plantains into 1 inch rounds.
  4. Bake for about 15 minutes or until tender.
  5. Wait for the plantains to cool down, transfer to a food processor and grind the plantains until they become fine crumbs.
  6. Add the rest of the ingredients and blend until a dough is formed. Make sure the plantains aren’t too hot or the egg will cook.
  7. Roll the though into 1 ½ to 2 inch balls
  8. Place over a piece of parchment paper, cover with another piece of parchment paper and using your hands or a rolling-pin flatten them into a 1/8 inch thick tortillas.
  9. Place a small amount of filling in the middle of the tortilla.
  10. Using the parchment paper, fold the tortilla in half.
  11. Press the sides of the empanadas with your fingers to secure the filling inside
  12. Place empanadas in a cookie sheet and bake at 425 F for about 20 minutes on each side or until golden brown
  13. Serve as is or with fresh salsa, guacamole or chimichurri


Appetizer · Beef · Entree

Deli-Style Roast Beef and the Paleo Sandwich

Roast beef Paleo Sandwich
//
http://pagead2.googlesyndication.com/pagead/show_ads.js
I have never been much of sandwich person. To me, a real meal should be warm and planned out.  However, after I created this, my stance on sandwiches took a complete turn. I also have a hard time finding sandwich meats that are nitrate-free and preservative-free. I have even seen deli meats,  that contain sugar, high fructose corn syrup, corn, starches,  or wheat. With this deli-style roast beef recipe you can be certain of the ingredients that you are putting in your body…just meat, oil, salt and spices, no junk and no fillers.

You can also enjoy this warm as you would any other roast, or slice it thinly to make sandwiches with it.

I have been enjoying watching my number of Facebook friends increase, to me that means that people care about what they eat and are enjoying my recipes, but today I learned about a part of my Facebook stats that shows me how many people have un-liked my page, at first I was a little bummed and started trying to find out what made them leave. I noticed that on the days that I posted something related to meat or discussing prop 37, the number of un-likes increased considerably. Aside from this, I have been avoiding posting meat recipes because it often means that angry vegetarians or vegans are going to start trolling my page, by this I am not generalizing because I know I have a large number of followers who are vegetarians or eat grains and are completely respectful and supportive of my page.  But today I realized that this is my page, and I should be free to post about the things that I consider healthy and delicious. I also understood why those “un-likes” are also a good thing.  As I say often, “Eat and let eat.”

Ingredients:

I round grass-fed beef round eye roast (approx 4 lbs) *
Olive oil or melted coconut oil
Favorite spices (thyme, cumin, garlic powder, onion powder
Salt and pepper to taste

For the Paleo sandwich you need a few large cucumbers, lettuce, shredded carrots, sliced bell peppers, cherry tomatoes and your favorite condiments

Preparation:

  • Rub the meat with the oil and spices
  • Cover it and let it sit outside the fridge for about 1-3 hours to bring to room temperature
  • Preheat oven to 500 F
  • Bake the meat at 500 for 20 minutes
  • Reduce heat to 300 and cook for an additional 30 minutes or until desired doneness. Check the inside temperature by inserting a meat thermometer in the center of the roast. For rare remove the meat when the thermometer reads 120 F, for medium rare remove at 125 F, 135 for medium, and 140 for well done
  • Remove the roast from the oven, cover with parchment paper and let stand for about 15 minutes before carving
  • Cut the meat against the grain into thin slices and eat warm.
  • If you are making deli-style reast beef for sandwiches, wrap the meat with plastic wrap, refrigerate over night of for a few hours and then cut into very thin slicesHow to make deli-style roast beef

For the paleo sandwich

  • Peel the cucumbers (optional)
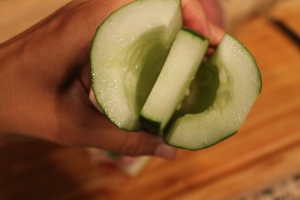
  • Remove a thin slice lengthwise from the side of the cucumber, this will prevent the cucumber from rolling
  • If the cucumber is to large to comfortably bite into it, cut a slice out from the middle and reserve to make another sandwich with it.Paleo Sandwich Recipe
  • Scoop the seeds out of the two outer slices and fill with the meat and other fixings.Paleo Sandwich

Serve an enjoy preferably during meatless Monday 🙂

* Most round roast have about the same thicknes and shapes, so the cooking time for them is about the same regardless of their weight.